Can I Use Plumbers Putty on a Stainless Steel Sink?
When it comes to sealing sinks, one of the most commonly used materials is plumber’s putty. If you’re working with a stainless steel sink, though, you may be unsure whether plumbers putty is the right option for you. In this article, we’ll explore everything you need to know about using plumbers putty on a stainless steel sink, including its composition and use, types of sinks, plumbing greases, and steps for application and removal.
What is Plumbers Putty?
Plumber’s putty is a soft and pliable sealing material that creates a watertight seal between two surfaces. It’s made from a mixture of clay and oils, which gives it its adhesive properties. This material has been used by plumbers for many years because of its versatility in creating water-resistant seals. When applied around the drain and other fixtures of sinks, it can prevent water from leaking under the sink or into nearby cabinets.
Composition and Properties of Plumbers Putty
The composition of plumber’s putty varies depending on the manufacturer. However, the primary materials used to make it are clay and linseed oil or mineral spirits. Even though many plumbers prefer traditional clay-based putties, today there are some modern formulations that have synthetic polymers added to them to improve adhesion performance.
Plumbers putty also has several important properties that make it useful for sealing sinks:
- It is moldable and pliable
- It doesn’t shrink or crack over time
- It remains soft for easy adjustments long after application
- It can adhere well to most surfaces commonly used in plumbing fixtures
Why Use Plumbers Putty on a Sink?
A plumber’s putty is a versatile material for use in plumbing. Besides sink installations, it’s frequently used in sealing toilet bases, shower drains, faucets, and any other joint or fixture where water tends to flow. It creates a watertight seal that prevents water from seeping out of the joint.
When applied around sink fixtures such as faucets, drains, and water pipes, plumber’s putty can be an excellent tool for preventing water from leaking into cabinets or onto the floor below the sink. It’s especially useful when working with older or uneven surfaces that need a little extra help to create a tight seal.
Benefits of Using Plumbers Putty for Sealing Sinks
The benefits of using plumbers putty on sinks are numerous:
- It’s flexible: This means it can be shaped and molded to fit almost any space or shape.
- It’s inexpensive: Compared to other sealing materials like silicone and caulking guns, plumber’s putty is affordable.
- It lasts longer: Plumbers’ putty resists shrinking or hardening over time, so it can maintain its seal for many years.
- It’s easy to work with: Because plumber’s putty is moldable and pliable, it can be simply pressed into place using your hands or a putty knife.
Types of Sinks
Sinks come in various sizes and materials, including stainless steel, porcelain enamel, fireclay, composite granite resin, and glass. Depending on the sink’s material type and purpose of use, plumbers putty may not be suitable for every application. Understanding which sinks are appropriate for use with plumber’s putty and which aren’t is critical.
Appropriate Uses of Plumbers Putty on Various Sink Materials
Plumbers putty can be used effectively on most sink materials. Here are some examples:
- Stainless steel sinks: Stainless steel sinks are a popular option for many homeowners because they are durable, long-lasting, and resistant to stains and corrosion. After installation, plumbers putty can be applied around the drain to create a tight seal.
- Porcelain sinks: Porcelain or ceramic sinks have a glossy finish and come in various colors. Plumbers’ putty can also seal these types of sinks around the drain using light pressure when applying it.
- Fireclay Sinks: Fireclay sinks are made from clay that has been fired at high temperatures, making them dense and heat-resistant. However, they can chip easily and need careful handling when installing drain components with plumbers putty.
Different Types of Plumbing Greases
In addition to plumber’s putty, there are several other types of plumbing greases that you can use to seal joints, including silicone or Teflon tape. However, using traditional petroleum or synthetic-based grease can lead to clogs in your sink’s drain pipes due to their composition. Therefore, it’s important to understand the differences between these types of greases before making your decision.
Comparison between Plumbing Greases and Regular Greases
The primary difference between regular greases and plumbing greases is that the latter is specifically formulated for plumbing applications. These greases are often thicker than regular ones and contain chemical additives that make them lubricious yet adhesive. Hence, plumbing greases like silicone grease has a unique water-resistant property that makes them ideal for use in plumbing systems.
Discussion on the Most Commonly Used Plumbing Greases
The most common greases used in plumbing include:
- Silicone Grease: Silicone grease is an excellent option for sealing faucet cartridges, o-rings, and valve stems because it doesn’t break down over time and is also waterproof.
- Teflon Tape: Teflon tape or “plumber’s tape” can also be used to seal pipes joints. Unlike putty and sealants, this type of plumber’s grease doesn’t dry out and crack over time, and it’s compatible with most materials.
- Petroleum Jelly: Petroleum jelly (Vaseline) is occasionally used to lubricate threads before attaching pipes. However, when it’s used on sink drains and other fixtures, it can cause clogs in pipe joints by attracting debris to its oily residue.
Risks Associated with Using Plumbers Putty on Stainless Steel Sinks
While plumbers putty is mostly risk-free for use in sink installations, it does present some potential downsides when it comes to stainless steel sinks. For instance, Plumbers putty could potentially stain or corrode the stainless steel surface. When exposed to direct contact with your sink material for extended periods, the oils might start to damage the steel surface finish.
In addition, plumbers’ putty can trap hard-to-clean debris over time and create leaks. Therefore, you may find yourself replacing the entire drain assembly if the sink connection was sealed using plumber’s putty previously. To avoid these issues occurring due to poor installation practices, ensure that the necessary procedures are followed by hiring a professional installer rather than attempting DIY projects.
Steps to Apply Plumbers Putty on a Stainless Steel Sink
Following the steps below, you can easily apply plumbers putty to your stainless steel sink:
Step 1: Clean and Dry the Area
Before applying plumber’s putty, ensure that the surfaces are clean, dry, and free of debris. By using warm water and soap or a mild cleaning solution, scrub all parts around the drain hole using a brush or sponge. Rinse the sink with plenty of tap water afterward and leave it to dry entirely before proceeding with the application process.
Step 2: Take an Appropriate Amount of Plumber’s Putty
Knead a small amount of plumber’s putty between your hands, forming it into a thin rope-like shape. With gloves on, position it around the drain opening by spreading it evenly with your fingers along its length. Keep in mind that you don’t necessarily require much amounts of plumber’s putty to form a good seal, but ensure you have enough covering the areas where you have leak potential, so be sure to strike a balance.
Step 3: Insert the Sink Drain into Place
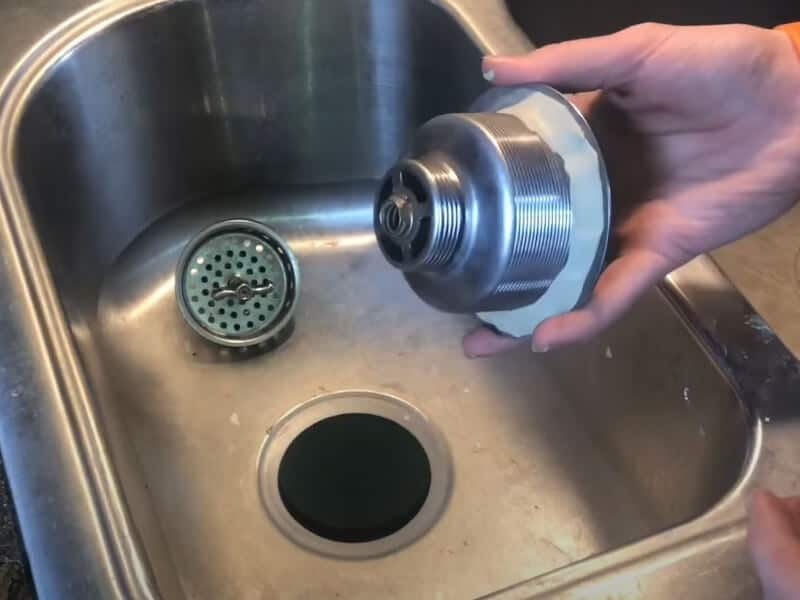
Gently and carefully position your sink drain assembly through the opening in your stainless steel sink and apply slight pressure to make contact with the plumber’s putty gently. Once you’re satisfied that it is well-placed in place properly, secure its assembly parts as per its instructions from the manufacturer.
Step 4: Remove Excess Plumber’s Putty
Clean any excess plumber’s putty residue from around the fixtures after securing them in place by running your finger gently along the perimeter of each fixture. Your goal here is to create an even and neat putty seal around the drain, faucet or other fixture you have set up.
Step 5: Finish Up
With everything securely in place, wait a few minutes for any excess plumber’s putty to dry and then wipe away any remaining residue using a damp cloth. Keep in mind that some putty material types will require overnight drying times to solidify correctly.
How to Remove Plumbers Putty from Stainless Steel Sinks
If you need to remove plumbers putty from your sink, follow these steps:
Step 1: Soften the Putty
Using a heat gun or hairdryer, warm up the plumbers putty until it becomes softer and more pliable. This makes it much easier for you to scrape it away from the surface of your sink without scratching its finish.
Step 2: Scrape off the Putty Residue
Using a plastic scraper or credit card, gently scrape off as much of the softened putty as you can. Work slowly and carefully so you don’t damage your sink’s surface underneath. Then remove any remaining residue with warm soapy water and a sponge.
Step 3: Polish the Sink!
Rinse the sink thoroughly clean before buffing it dry with a microfiber cloth. Using a stainless steel polish product afterward will restore its luster and shine. Avoid using abrasives on your sink’s surface, which may scratch it leaving behind unsightly marks.
Conclusion
If you’re planning on installing a new stainless steel sink or have concerns over your existing installation’s seals, then plumber’s putty can be an ideal solution for sealing your sink’s fixtures. With its moldable and pliable nature, it can be easily shaped to fit a wide variety of sink types including stainless steel, porcelain enamel, fireclay, composite granite resin, and glass. Just keep in mind that over time, because it could potentially stain or corrode the stainless steel surface, some other sealing alternatives might do a better job.
When handling plumbing projects, whether professional or not, it’s important to keep in mind the correct materials and procedures to prevent unnecessary damage or poor installation. Plumbers putty remains one of the most versatile plumbing materials out there with numerous benefits users can enjoy. Using plumber’s putty in your DIY plumbing projects provides a cost-effective and long-lasting solution that’s adjustable during application while delivering sturdy leak-proof seals.
1. Can I use plumber’s putty on a stainless steel sink without damaging it?
Yes, you can use plumber’s putty on a stainless steel sink without damaging it. However, it is important to apply it correctly and remove any excess putty before it hardens to prevent staining or discoloration.
2. Is plumber’s putty safe for food contact areas of a stainless steel sink?
While plumber’s putty is generally safe for food contact areas of a stainless steel sink, some brands may contain harmful chemicals. It is important to check the label and choose a product that is labeled as food-safe.
3. What should I use instead of plumber’s putty on a stainless steel sink?
If you prefer not to use plumber’s putty, there are other options such as silicone caulking or rubber gaskets. These alternatives provide a secure seal while being non-staining and easy to remove if necessary.
4. Can I use plumber’s putty on a stainless steel sink with a garbage disposal?
It is not recommended to use plumber’s putty on a stainless steel sink with a garbage disposal as the putty can get caught in the disposal blades and cause damage. Instead, opt for using rubber gaskets or silicone caulking to create a tight seal around the garbage disposal flange.


