How to Cut a Laminate Worktop without Chipping
Cutting a laminate worktop is an essential task that many DIY enthusiasts need to perform when fitting kitchens or renovating their homes. However, it can be a tricky task if not done correctly. The risk of damaging the worktop by chipping it is high when using power tools such as saws or routers. Therefore, it’s essential to follow the right procedures and use the appropriate equipment to avoid damaging the surface of the material while achieving an accurate cut.
In this article, we will guide you on how to cut a laminate worktop without chipping. We will cover all aspects of the process, from preparing for cutting to finishing and cleaning up. Our step-by-step guide gives clear instructions on how to achieve a clean and accurate cut every time.
Preparing to Cut
Before you begin cutting your laminate worktop, it’s essential to ensure that you have all the necessary tools ready. Using the wrong blade or not having enough clamps can increase the risk of chipping. Here are some factors you need to consider before commencing:
Choosing Appropriate Tools and Equipment: You’ll need power tools such as a jigsaw, circular saw, or router with sharp and fine-toothed blades suitable for laminate-cutting jobs. Handheld saws such as coping saws are also useful in performing detailed cuts such as sink holes or curvy parts.
Cleanliness: You want the surface of your worktop to be clean and free from debris so that you have smooth cuts and minimize any damage caused by debris getting between the blade and work surface.
Measuring and Marking Out: You need to measure out accurately where you wish to make your cuts with pre-measured markings before making them.
Cutting Techniques
Choosing the right cutting technique requires an understanding of the type of saws and blades that work well on laminate tops. Different cutting techniques work best for different types of cuts.
Different Types of Saws: The type of saw you use in making your cuts has a significant impact on how clean your cuts will be and the likelihood of a chipped edge. Circular saws are suitable when making long straight cuts, while jigsaws with fine-toothed blades are useful in cutting curves.
Choosing the Right Blade: A blade with fewer teeth means that you’ll cut through material faster, but it will leave rough edges or a chipped finish. Find a blade with more teeth which generate less pressure per tooth for a cleaner finish.
Straight Cuts: When making straight cuts, ensure that you clamp your piece to your bench securely to avoid movement which is likely to cause chips and jagged edges.
Cutting Intricate Shapes: A router or laminate trimmer specifically designed for laminate materials provides excellent results when cutting complex shapes and curves. The handheld tool allows you to make accurate and intricate cuts, especially around sinkholes and hob openings.
Essential Tips for Avoiding Chipping
Doing Test Cuts: Before making any actual cuts on your laminated worktop, do test cuts using scrap pieces to check the saw’s performance. Make adjustments where necessary before performing actual cuts on your worktop.
Clamping Worktop: Use clamps to secure the worktop firmly to prevent any movement/movements during cutting. It prevents the risk of jagged edges produced by blades intended for precise straight cuts.
Using Masking tape: You can reduce the risk of chipping by applying masking tape over the cut line before commencing on cutting. Masking tape helps prevent the material from chipping, especially in high-pressure areas.
Special Considerations
Cutting a laminate worktop can be complicated when dealing with sinks or hob openings. The process requires extra care and precision to achieve an accurate cut.
Around Sinks: Always mark off the centre of your sink before cutting. You should also take into account any overhangs by bringing the measurement line outwards from your first cut. Then use a jigsaw with a blade suitable for the job to make an accurate cut.
Uneven Edges or Corners: Templates or guides provide a helpful way of achieving accuracy. Utilize this to shape uneven edges into precise edges. Use trimmer blades or files to smoothen and finish off edges.
Working With Curved Sections: Routers offer excellent performance when working on curved sections of worktops. Besides, using a jigsaw with a fine-toothed blade will provide the precision you need, leaving your cuts with smooth edges.
Sanding and Finishing
Once you have cut through the worktop, it’s essential to sand down any rough or jagged edges that the blade may have caused during cutting.
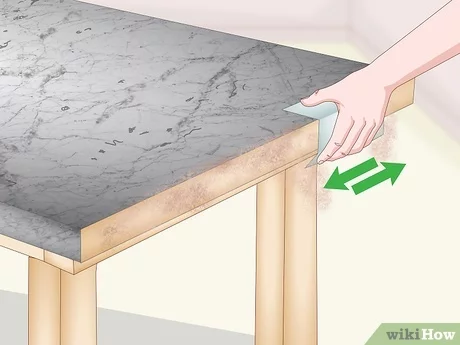
Sanding Edges Down: Sand down the edges of the worktop after cutting using different grits starting from fine (120) to medium (240) and finishing with coarse (400). This process softens any sharpness left after cutting, giving the edge a smooth finish.
Filing Tool: Here comes the hard part – reaching tight corners where pesky burrs and jaggedness can still occur despite using sand papers. A filing tool helps in getting into these corners that typically need more attention than straight parts. It offers high precision for making your finish neat on difficult edges.
Sealing and Edging: Sealing and use of edging strips offer the final touches to ensure that your worktop can withstand everyday wear and tear. Always check the adhesive quality and leave sufficient drying/waiting time before placing items on the worktop surface.
Cleaning Up and Maintenance
It’s important to maintain cleanliness during and after the cutting process to preserve the durability of your tools.
Cleaning off Debris: After successfully cutting through a worktop, pick and clean any debris around the surface with a brush or clean cloth. This ensures that no dirt or dust remains on the surface.
Maintain Your Tools: It’s essential to maintain your power tools-keeping them well-lubricated so they last longer. Ensure to store them correctly-desiccators storage boxes or bags after cleaning them.
Safety Precautions
Power tools require utmost care & attention during usage to reduce chances of injury.
Wearing Appropriate Safety Gear: Choose gear that guarantees maximum protection for your hands, eyes, nose/mouth and arms such as gloves, goggles/dust masks especially when cutting laminate worktops.
Work Area Setup: Set up your cutting area in a designated workspace free of water, liquids and other hazards while allowing enough space for movement around you. This allows for a better risk assessment & reduction to improve results.
Conclusion
In summary, knowing how to cut a laminate worktop without it chipping saves you time, effort & money if you’re capable of carrying out this task. Successful outcomes depend on choosing suitable tools, measuring & marking out cuts precisely, following proper techniques & guidelines throughout all steps in the process. Additionally, protecting yourself by wearing safety gear & maintaining hygiene for power tools keeps you and others safe while doing DIY projects.
FAQs for Cutting a Laminate Worktop without Chipping:
1. What tools do I need to cut a laminate worktop without chipping?
To cut a laminate worktop without chipping, you will need a fine-toothed blade saw or jigsaw, masking tape, clamps, and sandpaper.
2. How do I prevent chipping when cutting a laminate worktop?
To prevent chipping when cutting a laminate worktop, apply masking tape along the cutting line and clamp the worktop tightly to prevent vibrations. Also, use a clean and sharp saw blade with fine-toothed edges.
3. Can I use a circular saw to cut a laminate worktop?
Yes, you can use a circular saw to cut a laminate worktop if you use the appropriate blade. Choose a blade with at least 60 teeth designed for cutting laminates. Ensure that you adjust the cutting depth to match the thickness of your worktop.
4. Should I sand the edges of my laminate worktop after cutting?
Yes, you should sand the edges of your laminate worktop after cutting to smoothen them and prevent roughness and splinters that can cause injuries. Use fine grit sandpaper and then wipe off the dust with a damp cloth.


